School of Electrical & Electronic Engineering
20/1112 Semester Two - NVST Mini Project
20/1112 Semester Two - NVST Mini Project
You are an information security professional. You are being engaged by a company as Chief Security Officer (CSO) to conduct security evaluation for the company servers. Your duty is to conduct a series of test on all these servers and services running using the necessary tools to identify the potential risks in these servers and services setup. After that you will recommend the necessary corrective actions to these potential risks. You are given a temporary administrator account to conduct your investigation.
User name : temp
Password : password SAS code: LAB3
1. DNS Server
Tool use: Command prompt “Nslookup”
Problem: Typing command “nslookup” on the command prompt (cmd), an attacker will be able to invoke the program and start to obtain data from the name servers because all data in the server will be made available for the attackers upon nslookup command.
This is a problem because attackers can request the server to transmit all information regarding a domain using zone transfer request from the name server. All these information are beneficial for the attacker because its IP address and other information can be used in an attack (e.g. DoS attacks, an attack against zone’s DNS servers by sending multiple requests to slow down the server.)

Remedy: Choosing “Only to servers listed on the Name server tab” at Window 2000’s DNS Zone Transfer settings enables zone transfer to be restricted, except for trusted secondary server. This will result into “*Can’t list domain XXX: Query refused”, which also means a secured server.
Choosing “Name Servers tab” enables trusted secondary server allowed for zone transfer to view all the data information upon nslookup command by keying in their respective compute IP addresses.
To modify zone transfer settings using the Windows interface
1. Open DNS Manager.
2. Right-click a DNS zone, and then click Properties.
3. On the Zone Transfers tab, do one of the following:
· To disable zone transfers, clear the Allow zone transfers check box.
· To allow zone transfers, select the Allow zone transfers check box.
4. If you allowed zone transfers, do one of the following:
· To allow zone transfers to any server, click To any server.
· To allow zone transfers only to the DNS servers that are listed on the Name Servers tab, click Only to servers listed on the Name Servers tab.
To allow zone transfers only to specific DNS servers, click Only to the following servers, and then add the IP address of one or more DNS servers.
Tool use: iis lockdown tool
Problem: The web server name is shown when an attacker launch an attack using Superscan 4 program to do banner grabbing. This will allow him to find out the web server application at the machine. attackers can retrieve header information of the web server containing the web server application and its current version (i.e. Microsoft IIS/5.0). By gaining such information, it is a problem because attackers will be able to discover the known vulnerabilities of that particular web server and continue to exploit it by sending a malformed URL to the server. Using an IIS version of 5.0, it possess an Unicode extension, which exploit using HTTP protocol and malformed function to transverse directories and executes arbitrary commands on vulnerable web servers. Other unused features included in the server can also pose as a security threat.
Remedy: IIS Lockdown works by turning off unnecessary features such as web server name, thus reducing attack surface available to attackers.this include renaming the web server name into any other name. This also provide multiple layers of protection against attackers, such as Superscan 4 and URLscan. with customized templates for each supported server role, is integrated into the IIS Lockdown Wizard.
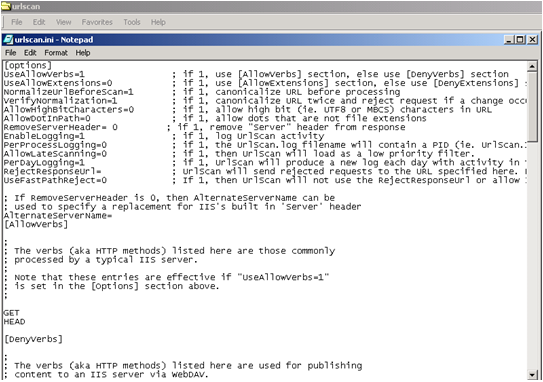
It is necessary to remove the header information of the web server from respond by changing the configuration setting (i.e. RemoveServerHeader=1) in the urlscan folder after installing IIS LockDown tool in Windows 2000 and do a URLScan update after that.
3. Telnet Server
Tool use: SSH
Problem: Telnet enables access to a command-line interface on a remote host and does not encrypt data sent over the connection, which includes usernames and passwords and sends in clear text. This resulted into an unsecured connection Attackers can gain information by eavesdropping into the connection using Ethereal as all the telnet data captured by Ethereal are sent in clear text and being made available to attackers easily for them to gain access into a network.
Remedy: Using encryption tools such as mobaSSH (SSH version 2), Install the SSH on server and Putty on client. Using the SSH function from Putty allows all clear texts will be encrypted and therefore, hidden from the attacker. This disables them from retrieving user information and gain access into a network.

4. Password
Tool use: At Local Security Settings (Strong password policy)
Problem: Attacker can quickly guess these passwords by using password guessing tools to retrieve the password if it is one of the words in the dictionary. Also, If the password length is too short, it would be a weak password could crack it easily using brute force attack.
Remedy: By adjusting the configuration settings in the Account Policies (Password Policy and Account Policy), it enables the user’s server account to be more secured., specifying a minimum length and prohibiting the use of dictionary term.
Password should be at least 8 characters long, and should be required to include non-alphanumeric characters.
5. How to close unused port?
Tool use: TCP/IP filtering
Problem: Attackers using port scanning tools (SuperScan 4.0) can easily identify running services on a host and scan for listening ports on a single target host.
By using SuperScan’s HTML results, all the TCP/UDP ports in use by the server will be easily made known. Using netstat command at Window 2000 (i.e. netstat –a), a list of ports will be shown upon request. By comparing with the ports listed at the netstat command and the SuperScan HTML results, there will be some ports that are listed in netstat, not listed in SuperScan. This justifies which port are required to be closed or unused.
Attackers can easily gain entry point into target computer and exploits the vulnerability from the open once they are aware which port is available.
Remedy: To prevent an attacker from discovering open ports on your machine is to close any unused ports using TCP/IP filtering and Periodically run the vulnerability scanning tools against your own networks to identify vulnerabilities before an attacker does.
How to configure TCP/IP security
To configure TCP/IP security:
1. Click Start , point to Settings , click Control Panel , and then double-click Network and Dial-up Connections .
2. Right-click the interface on which you want to configure inbound access control, and then clickProperties .
3. In the Components checked are used by this connection box, click Internet Protocol (TCP/IP) , and then click Properties .
4. In the Internet Protocol (TCP/IP) Properties dialog box, click Advanced .
5. Click the Options tab.
6. Click TCP/IP filtering , and then click Properties .
7. Select the Enable TCP/IP Filtering (All adapters) check box. When you select this check box, you enable filtering for all adapters, but you configure the filters on a per-adapter basis. The same filters do not apply to all adapters.
8. There are three columns with the following labels:
TCP Ports
UDP Ports
IP Protocols
UDP Ports
IP Protocols
In each column, you must select either of the following options:
Permit All . If you want to permit all packets for TCP or UDP traffic, leave Permit All activated.
Permit Only . If you want to allow only selected TCP or UDP traffic, click Permit Only , clickAdd , and then type the appropriate port in the Add Filter dialog box.
Permit Only . If you want to allow only selected TCP or UDP traffic, click Permit Only , clickAdd , and then type the appropriate port in the Add Filter dialog box.
If you want to block all UDP or TCP traffic, click Permit Only , but do not add any port numbers in theUDP Ports or TCP Port column. You cannot block UDP or TCP traffic by selecting Permit Only for IP Protocols and excluding IP protocols 6 and 17.

No comments:
Post a Comment